


 本文介绍了在 CentOS 系统上搭建 GitLab 的基本步骤。首先,需要准备基础环境,如更新系统、安装基础工具。接着,安装 PostgreSQL 作为默认数据库,安装 Redis 用于缓存等 GitLab 服务。
GitLab 是一款开源的代码托管平台,集代码仓库、持续集成与部署、代码审查等功能于一体。本文将指导你在 CentOS 系统 上搭建 GitLab。
一、准备工作
1. 系统要求
操作系统:CentOS 7 或 CentOS 8
硬件要求:
CPU:2 核或以上
内存:4GB 或以上
磁盘:20GB 可用空间
2. 配置基础环境
执行以下命令,更新系统并安装基础工具:
yum update -y
yum install -y curl policycoreutils-python openssh-server perl
二、安装所需组件
1. 安装 PostgreSQL
GitLab 使用 PostgreSQL 作为默认数据库。安装并初始化:
yum install -y postgresql-server
postgresql-setup initdb
systemctl enable postgresql
systemctl start postgresql
2. 安装 Redis
Redis 用于缓存和其他 GitLab 服务:
yum install -y redis
systemctl enable redis
systemctl start redis
三、安装 GitLab
1. 添加 GitLab 软件源
使用官方脚本配置 GitLab 社区版(CE)软件源:
curl -sS https://packages.gitlab.com/install/repositories/gitlab/gitlab-ce/script.rpm.sh | sudo bash
2. 安装 GitLab
安装 GitLab CE 并指定外部访问地址:
EXTERNAL_URL="http://your-domain-or-ip" yum install -y gitlab-ce
3. 配置数据存储路径
修改 GitLab 配置文件/etc/gitlab/gitlab.rb:
git_data_dirs({
"default" => {
"path" => "/data/gitlab/git-data"
}
})
gitlab_rails['backup_path'] = "/data/gitlab/backups"
4. 启动 GitLab
应用配置并启动 GitLab:
gitlab-ctl reconfigure
gitlab-ctl restart
5. 查看初始密码
GitLab 在初始化时会生成一个管理员账号密码,查看文件即可:
cat /etc/gitlab/initial_root_password
四、访问 GitLab
在浏览器中输入 http://your-domain-or-ip
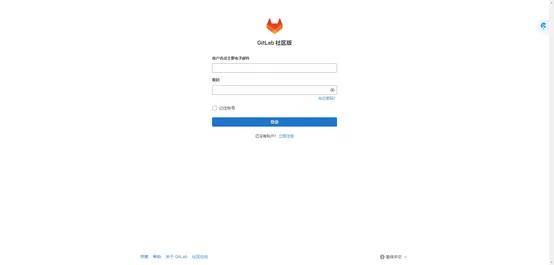
使用 root 账户和生成的初始密码登录
登录后可创建项目、管理用户、配置 CI/CD 等
五、GitLab 常用命令
1. 服务管理
启动 GitLab:gitlab-ctl start
停止 GitLab:gitlab-ctl stop
重启 GitLab:gitlab-ctl restart
检查服务状态:gitlab-ctl status
2. 配置与日志
重新配置 GitLab:gitlab-ctl reconfigure
查看配置文件:cat /etc/gitlab/gitlab.rb
查看日志:less /var/log/gitlab/gitlab-rails/production.log
3. 数据备份与还原
手动备份:gitlab-rake gitlab:backup:create
还原备份:gitlab-rake gitlab:backup:restore
清理旧备份文件:gitlab-ctl cleanup
六、GitLab 组件说明
GitLab 是一个复杂的集成系统,主要组件如下:
组件
功能说明
Puma
运行 GitLab Rails 的 Web 应用服务器
Redis
用于缓存和会话管理
PostgreSQL
数据库服务,存储 GitLab 的核心数据
Nginx
静态文件服务和反向代理
Sidekiq
后台任务处理
Prometheus
系统监控与报警工具
Gitaly
提供 Git 仓库服务,支持 Git 操作
七、GitLab 目录结构
目录位置
说明
/var/opt/gitlab/git-data/repositories仓库存储目录
/opt/gitlabGitLab 安装路径
/etc/gitlab配置文件路径
/var/log/gitlabGitLab 日志存储路径
/var/opt/gitlab/backups备份文件存储目录
八、最佳实践
1. 定期备份
添加定时任务,每天自动备份:
crontab -e
# 添加以下内容,每天凌晨备份
0 0 * * * /opt/gitlab/bin/gitlab-rake gitlab:backup:create CRON=1
2. 启用日志轮转
防止日志文件过大:
gitlab-ctl logrotate
3. 优化性能
根据服务器配置,调整以下参数:
puma['worker_processes']:设置为 CPU 核心数
sidekiq['concurrency']:设置合适的并发数
4. 配置 SSL
启用 HTTPS 确保传输安全:
在配置文件/etc/gitlab/gitlab.rb 中配置 SSL 证书路径
重启 GitLab:gitlab-ctl reconfigure
九、总结
本文介绍了在 CentOS 系统上安装和配置 GitLab 的完整流程,包括组件介绍、目录结构以及最佳实践配置。完成这些步骤后,你将拥有一个功能强大的代码托管平台。如果有其他问题,欢迎在评论区讨论!